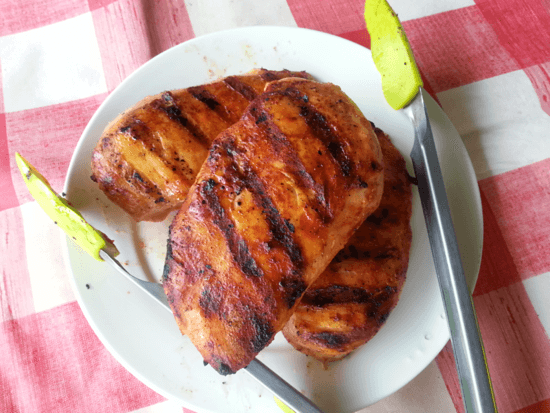
Citrus Chili Marinade – Perfect for Chicken
Citrus dressing of any kind makes grilled chicken taste great
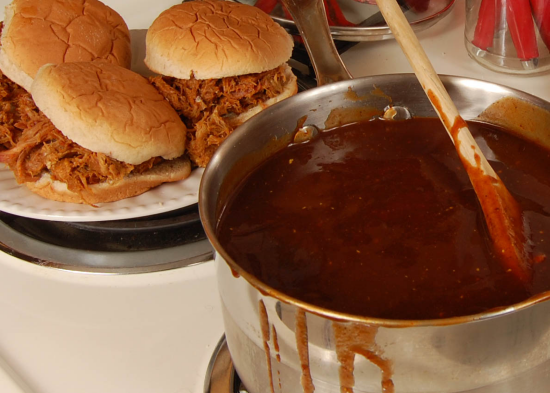
St. Patrick's Day with Guinness Irish Beer BBQ Sauce
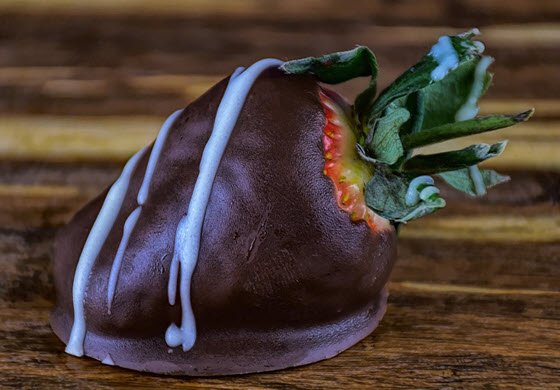
Kent Whitaker, Author of this Chocolate Covered Strawberry Post, also known as “The Deck Chef,” is an award-winning culinary writer and cookbook author. He’s also penned Young Reader, NASCAR and History titles. The former winner of the Emeril Live Food Network Barbecue Contest also covers football, motorsports, and bass fishing. Kent currently lives in East Tennessee with his wife, son, and a couple of dogs that love when he fires up the smoker or grill. You can reach out to Kent at: The Deck Chef, on Facebook, or Instagram, and Twitter. Chocolate-covered strawberries and Valentine's day go together! The combination of flavor, texture, and sweetness make for a perfect treat. It’s decadent enough to satisfy a craving and yet we can munch down on them without worrying about calories from the chocolate… because calories don’t count on February 14th! Sadly, the calories still count, but why not enjoy the moment! The great thing is that you can make these on your own as a surprise for a loved one. Or, you can make them as a couple, and the recipe can be kid-friendly once the chocolate is melted. Don’t Stress about Melting Chocolate First, don’t worry about melting chocolate. Simply follow the directions on the packaging! Just make sure you purchase melting chocolate for making candy. The package will be marked and in the baking section of your grocery store. Sometimes it’s called “bark” chocolate. If you are comfortable using a double boiler, then go that route. If not, almost every package has directions for using a microwave. And, if you don’t want to melt chocolate and let it re-harden, a simple squeeze bottle chocolate drizzle never made anyone mad! Prep the Strawberries Here’s the secret to making chocolate covered strawberries and it’s not the chocolate! It is the strawberries! To be exact – it is the moisture in the strawberries! People may think they did something wrong with melting chocolate because it does not stick to the strawberry! That may be because the strawberries are moist or wet. Make sure when you rinse and remove excess stems that you allow them to completely dry. And, avoid slicing the strawberries. You want a dry, whole strawberry. One note – leave some of the green at the top of the strawberry, but remove any excess or browned pieces. The Process – Simple! Ok, you have your clean and dry strawberries and some melted chocolate. You also have your sprinkles ready… what’s next? Here’s the trick! [...]
What’s the Best Grade of Steak for Grilling? It seems that meat prices, such as steaks, are always on the rise and that’s even truer due to processing plants shuttering temporarily due to COVID-19 concerns. So it’s a good time to have a better understanding of the different ratings for beef. Just in case you were wondering, there are eight different beef quality grades! Who knew? This explains why a ribeye in one section of the meat counter is one price and a similar-sized cut a few steaks away is more expensive. Of course, you can factor in the weight and the thickness of each steak when pricing. But there’s a good chance that one row of those ribeyes in the meat counter is one grade while the ones a few rows over are a different grade. The lower grade, the lower quality of the cut. What Determines a Grade? So, the basic question is what determines the grade of steak or beef in general? The USDA has eight beef quality grades. Surprisingly, the grades are based on only two main things. The first is the degree of marbling (aka intramuscular fat) in the beef. The second is the maturity, estimated age, of the animal at the time of slaughter and processing. Most Common Grocery Store Grades Don’t worry, you don’t have to remember all eight grades of beef. When it comes to grilling steaks or slow baking a roast, then the number of grades is only around three. That’s unless your buying steaks from a sketchy van with a built-in freezer parked in some parking lot… then you may need to know the lower grades! Here’s how those three grades three break down according to the Cattleman’s Beef Association. PRIME – Most Expensive Prime beef is produced from young, well-fed cattle. It has abundant marbling, is produced in smaller quantities than other grades, and is often sold in hotels and restaurants. Prime roasts and steaks are excellent for roasting, grilling, or broiling. CHOICE Choice beef is high quality and produced in highest quantity, but has less marbling than Prime. Choice roasts and steaks, especially from the rib and loin, will be very tender, juicy, and flavorful. They are suited for roasting, grilling, and broiling. Less tender cuts are perfect for slow-cooking. SELECT Select beef is slightly leaner than Prime and Choice because it has less marbling. It can lack some tenderness, flavor, and juiciness as compared to the higher grades. Select grade beef often benefits [...]
Author Bio: Kent Whitaker (Author of this post Recipe for Chocolate Lovers), also known as “The Deck Chef,” is an award-winning culinary writer and cookbook author. He’s also penned Young Reader, NASCAR and History titles. The former winner of the Emeril Live Food Network Barbecue Contest also covers football, motorsports, and bass fishing. Kent currently lives in East Tennessee with his wife, son, and a couple of dogs that love when he fires up the smoker or grill. You can reach out to Kent at www.thedeckchef.com, Facebook, Instagram, and Twitter. The Perfect Recipe for Chocolate Lovers on Valentine’s Day: Many people opt for a private home cooked meal on Valentine’s Day instead of spending too much on dinner out with possibly inflated prices. Hey, there’s nothing wrong with a big dinner out with your Valentine if the budget and schedule allows it. However, many may find a romantic dinner at home more affordable and equally desired. The trick is to make sure the romantic event is different from a normal meal Here are some suggestions followed by a quick and easy recipe for Chocolate lovers! Simple is the ticket during the month for lovers. You want to impress your dinner partner. But that does not mean picking a dish that requires you spending all your time in the kitchen. Nothing says love like waiting for hours while food is cooking. Keep it quick and simple… but new. Keep it fresh. This applies on two levels, fresh foods and a fresh recipe. Avoid bland frozen items and choose a dish that is not something the two of you would eat on a regular basis. Comfort But try to stay in both of your comfort zones. This is not the time to try an exotic recipe for the first time. One, make sure you can cook the dish. Don’t pick something that takes more skill than you can muster, or time than you can dedicate to it. Two, don’t go crazy on something that neither one of you would really enjoy. Portions Size. Dishes are smaller, everything is easier, cooking time is reduced and both of you are more likely to enjoy each other’s company more if you don’t feel the need for a nap after dinner. Clean Up! Are you kidding me? Save the dishes for later. In short, make it simple, realistic and something you know you can cook but don’t all the time then try to add a twist. And even if you [...]
So you’re camping out and getting your cooking gear together! Or, maybe you’re just going to fire up the grill in the backyard and cook for family and friends. Maybe you’re gathering your tailgate supplies for the College and Pro football season. Whichever version of outdoor cooking you’re leaning towards it’s always a great idea to keep a few food safety tips in mind. Hopefully, there won’t be any problems! But here are three safety hacks that are perfect for the back yard, tailgate or the campsite. Safe Cookouts ONE – Cold and Hot - Safe Temperatures – Digital Thermometers The general rule of thumb that I mention during my chef demos is this; Keep the cold food cold and keep the hot food hot. Use ice to keep cold foods chilled while serving. Such as a bowl of pasta salad resting in a tray of ice. Never mix ice used for consumption with ice used to store food – especially any meat that could drip raw fluids. Also, cook/grill meats to their proper internal temperature. The only way to do this is with a thermometer. Personally, I use Digital Thermometers for a variety of things. I have a Digital Instant Read Thermometer that’s pocket-sized and perfect for camping and tailgating. Safe Cookouts And I have a Bluetooth Thermometer which sends the chamber temperature of my barbecue smoker to my cell phone. Plus I have a couple of older plain cooking thermometers for backups in case a battery dies. Use your thermometer to check the internal temps so you properly cook items to the USDA recommendation. This takes care of harmful bacteria that may cause illness. Temps differ from meat to meat so I’ve added the USDA Temperature Chart below. Beef, Pork, Veal & Lamb Steaks, chops, roasts 145 °F (62.8 °C) and allow to rest for at least 3 minutes Ground meats 160 °F (71.1 °C) Ham, fresh or smoked (uncooked) 145 °F (62.8 °C) and allow to rest for at least 3 minutes Fully Cooked Ham (to reheat) Reheat cooked hams packaged in USDA-inspected plants to 140 °F (60 °C) and all others to 165 °F (73.9 °C). All Poultry (breasts, whole bird, legs, thighs, and wings, ground poultry, and stuffing) 165 °F (73.9 °C) Fish & Shellfish 145 °F (62.8 °C) Source USDA.gov If the food you are serving was stored in the fridge then that food needs to be kept chilled during serving. Hot food from the grill, oven, grill or stove should [...]
About the Author: Kent Whitaker who is author of this post Grilled Foil Fish is a culinary writer and cookbook author. He is the winner of the Emeril Live BBQ contest and winner of an American Authors Association Gold medal. Kent’s books are in bookstores nationwide and are available online. Kent lives in Chattanooga. Visit him online at www.thedeckchef.com Grilled Foil Fish: The Ultimate Guide Sometimes you want something other than a hot dog or burger on the grill and that’s where seafood comes in to play. Seafood, from simple cod fillets to shrimp, clams, oysters, shark steaks, and more are all perfect for cooking over hot coals or open gas flames. The trick is to understand one important thing… grilling seafood is incredibly simple! And that’s where using something as simple as a foil fish boat comes in handy. Unless you grill all of the time and have a wide variety of non-stick grilling baskets you may be hesitant about grilling more delicate white fish fillets directly on the hot grate. The obvious fear that that the fillet will break apart… which it will naturally flake when it’s done. Flakes can turn into large chunks of your meal falling into to fire. Why a Boat and not just a sheet of Foil? What’s a foil fish boat? – all you are really doing is providing a nice surface that you can grill thin and delicate filets on worry-free. A splash of butter or non-stick spray is all you really need. I love foil and this is a recipe and technique that I use to cook seafood and shrimp on the grill. T also works with vegetable burgers and turkey burgers. The point is, you have the smooth surface of a skillet with the smoky flavor from your grill! Here’s where a “boat” comes in handy! By forming a boat or bowl type of shape with your foil you can add additional items in without having to worry about things sliding off. Plus, depending on how thin your fillet is, you may not even need to turn it. Just let the heat from the bottom coals and the refracted heat from a closed cover grill, smoke and bake your fish at the same time. And, if the sides of the foil are long enough you can add the ingredients, fold lightly to seal, and then grill. You’ve just eliminated the worry of serving dried out fillets. Serving shrimp? Toss in the shrimp, sprinkle with [...]
Grilled Pizza: Everything You Need to Know Are you looking for something to cook on the grill over the Memorial Day weekend but want something besides burgers, dogs, or any of the other common dishes? Not that there’s anything wrong with traditional Memorial Day eats… but why not grill some pizza? Yep, you can grill pizza! Think of it this way – why buy an expensive outdoor pizza oven if you already have a covered grill? You can use charcoal or gas along with some wood chips of your choice. I’m not knocking outdoor pizza ovens, I think they are cool and make for great pizza. But, if you’re only going to cook a pizza outdoors a couple of times a year… then save some money and fire up the grill and do something different! No Dough Tossing Skills Needed Don’t worry. You won’t have to learn to toss dough over your head like those cool guys in high-end pizza eateries. But I do think that would be fun to learn, or at least give it a try. Here’s how to get your grilled pizza adventure started. First, you need a covered grill. Then you need some store-bought pizza crusts and your favorite toppings. I suggest using smaller crusts as opposed to the large size simply because they fit on grill racks better and are easy to handle. Plus, each person can custom make their own pizza. If you only can find the large crusts then you may need to cut them in half depending on your grill. If you go with a softer crust such as raw dough, then use a cookie sheet, foil, or a grilling mat to pre-cook it before adding your toppings, sauce, and cheese. Toppings from BBQ to Traditional You can use all of the traditional items like Ham, beef, sausage, pepperoni, Canadian bacon, veggies and more. Plus you need some cheese and some sauce. All of this really boils down to your favorite toppings. I suggest that all of the meat toppings be fully cooked. Then, all you are doing is warming things up and melting cheese! Add sauce to your crust along with the toppings, place it on the grill with low to medium heat, close the lid until everything is golden and the cheese is melted. Remember, the crust is done, chances are you used pre-cooked meat toppings so all you have to do is warm everything up and melt the cheese. Your grill determines on if you [...]